Tuesday, November 15, 2011

Terrain WIP: finishing main painting

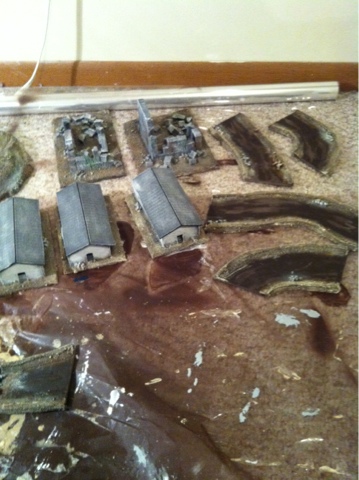
The terrain is starting to look more finished. After the grey basecoat, I drybrushed a lighter grey and skull white onto the grey/rock/building areas. Then the brown/sand areas were drybrushed bestial brown and bleached bone. A little green and brown were brushed here and there for weathering purposes. Next step: flocking on hills, craters (maybe?), etc, painting the river and detailing the barracks (not a lot of details planned but just a couple of things like doors, window bars..)

Flames of War French Infantry based

Here are the contents of the french infantry company as well as the goum HQ blister all based. Basing was done by spreading patching plaster on the bases first. Once dry, I glued some play sand then sealed it with watered down glue. Then the bases were painted scorched brown, drybrushed bestial brown then Vallejo dark sand ( bleached bone equivalent). Now the models are ready for some basecoat! (once fully painted I'll add some flock to the bases)

Monday, November 14, 2011

Terrain WIP: grey paint

First layer of darker grey applied in rocky areas and buildings and first dry brush of medium grey (codex grey type)

Sunday, November 6, 2011

Terrain WIP: undercoat

Terrain undercoated with flat brown spray paint. Note that the foam (in the foam board and the hills) has to be really well covered in plaster or PVA glue otherwise it will melt with the spray paint. It has happened at tiny holes on the hills for me, will patch it up afterwards. Not a big deal but something to be aware of.

Saturday, November 5, 2011

Terrain WIP

Terrain was covered up with patching plaster then once dry, play-sand from Home Depot was glued (2$ for 50 pounds!).
Once dry, a layer of watered down PVA glue was applied on the sandy areas to secure the sand particles.