Sunday, December 11, 2011

Painting in Progress: Flames of War French Infantry Company

Two colors of camo done for guns (Flames of War paint Gunship Green 895, and Tan Yellow 912). A third brown color will be added to the camo. And Goum djellabas are GW Codex Grey.

 Basecoating of infantry done (coats and pants are Flames of War paint Green-Brown 879).

Finished Cassino Barracks

Finished three barracks for Flames of War Cassino campaign. In all three buildings, roof can be removed to fit 4 stands of infantry. 


Finished Craters

Looking a little simple but can be used in the Flames of War Cassino Campaign as bullet proof cover. Also can be used to replace a wrecked vehicle in 40K.


Finished Hills

Big hill with 2 steps


Smaller Hill with single step

Finished Ruins

Ruin #1


Ruin #2


Ruins are based on left over from Hirst Arts molds projects.

Finished Rivers

The total length of all the river sections aligned is about 28 mm. These rivers can be used as big rivers for Flames of War or smaller streams for Fantasy or 40K. 


Thursday, December 1, 2011

Magnetizing the Necron Doomsday/Ghost Ark

This post is a tutorial on my first try to magnetize a Necron Doomsday/Ghost Ark. The goal of the magnetization is to easily be able to swap between the Doomsday Ark and the Ghost Ark.

The supplies needed for this magnetization are:

-A Necron Doomsday/Ghost Ark !
-Plastic Glue
-Super Glue
-Green Stuff
-A piece of balsa wood (or chopsticks) about 1/2'' in diameter or 1/2'' x 1/2'' (basically the right size to fit inside the main cylinder of the 'rib cage' of the Ark
-Rare Earth magnets:
      -7 3/8'' diameter x 1/8'' thickness cylindrical magnets (model D62 from K&J Magnetics)
      -10 1/8'' x 1/8'' 1/8'' cubic magnets (model C222 from  from K&J Magnetics)
      -10 1/4'' diameter x 1/16'' thickness cylindrical magnets (model D41 from K&J Magnetics)

Onto the initial building work: 

1. Build the Cresent part following the instructions in the box.

2. Build the 10 Necron warriors on their stand following the instructions in the box .

3. Build the Cannon following the instructions in the box.

4. Build the prow part  following the instructions in the box.

5. Build the 'rib cage' part following the instructions. In here, you will have to choose in which direction you glue the rifles in place. In my case, I chose them to be in the right direction for the Ghost Ark. I don't think they look bad upside down at all. Magnetizing those will really bring the complexity level up, and I wanted to keep this simple.

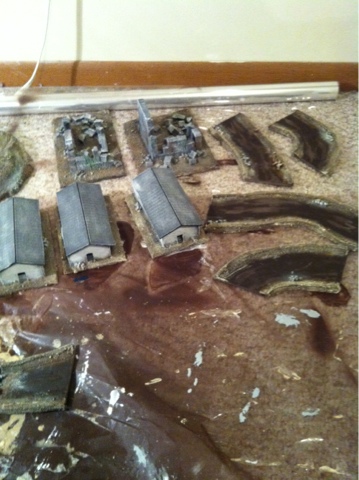
After the building stage, you end up with these parts:

Now, onto the magnetization part:

1. Stick the piece of balsa wood inside the cannon: it will help your assembly be sturdier.

2. For the 10 Necron warriors: cut the end cubic part where you attach them to the rib cage, glue the cubic magnet where you just cut the plastic. Make sure all the cubes are glued with the same polarized side sticking out.

3. Clear the opening of the Cannon, the rib cage, the two open spots in the crescent, the prow and the end cap in order to be able to fit the large disc magnets (3/8'' inch diameter).

4. Using super glue and green stuff, glue the 3/8'' magnets to these spots. Be careful with magnet polarization! Before you actually glue the magnets, make sure the corresponding parts will attract and not repel.

5. On the rib cage part, where the Necron warriors are supposed to go, glue the small disc magnets (1/4'' diameters). Again, be very careful with polarization.

After this step you should end up with something looking like the pictures below:


Now the final step is to test your magnetization. Here I found a few adjustments where needed such as cutting some of the wires off of the cannon. The Ark is not magnetized to the flying base because that would leave a very visible magnet on the rib cage main cylinder in the case of the Ghost Ark.

This is the final Ghost Ark:

 And the final Doomsday Ark: 

This is it! Swapping from one to the other is pretty simple and fast, and the painting will be that much easier!

Comments, critics welcome!

Tuesday, November 15, 2011

Terrain WIP: finishing main painting

The terrain is starting to look more finished. After the grey basecoat, I drybrushed a lighter grey and skull white onto the grey/rock/building areas. Then the brown/sand areas were drybrushed bestial brown and bleached bone. A little green and brown were brushed here and there for weathering purposes. Next step: flocking on hills, craters (maybe?), etc, painting the river and detailing the barracks (not a lot of details planned but just a couple of things like doors, window bars..)

Flames of War French Infantry based

Here are the contents of the french infantry company as well as the goum HQ blister all based. Basing was done by spreading patching plaster on the bases first. Once dry, I glued some play sand then sealed it with watered down glue. Then the bases were painted scorched brown, drybrushed bestial brown then Vallejo dark sand ( bleached bone equivalent). Now the models are ready for some basecoat! (once fully painted I'll add some flock to the bases)

Monday, November 14, 2011

Terrain WIP: grey paint

First layer of darker grey applied in rocky areas and buildings and first dry brush of medium grey (codex grey type)

Sunday, November 6, 2011

Terrain WIP: undercoat

Terrain undercoated with flat brown spray paint. Note that the foam (in the foam board and the hills) has to be really well covered in plaster or PVA glue otherwise it will melt with the spray paint. It has happened at tiny holes on the hills for me, will patch it up afterwards. Not a big deal but something to be aware of.

Saturday, November 5, 2011

Terrain WIP

Terrain was covered up with patching plaster then once dry, play-sand from Home Depot was glued (2$ for 50 pounds!).
Once dry, a layer of watered down PVA glue was applied on the sandy areas to secure the sand particles.

Monday, October 31, 2011

1rst Club Logo Attempt

First attempt with club logo. I am not a wiz with photoshop. What do you guys think?